Installation
If the installation instructions on the homepage or the Getting Started guide did not work on your environment, or if you’d like to learn more about how to manage your Meltano installation, you’ve come to the right place.
Short on time, or just curious what the fuss is about?
To get a sense of the Meltano experience in just a few minutes, follow the examples on the homepage or watch the "from 0 to ELT in 90 seconds" speedrun
They can be copy-pasted right into your terminal and will take you all the way through installation, data integration (EL), data transformation (T), orchestration, and containerization with the tap-gitlab extractor and the target-jsonl and target-postgres loaders.
Local Installation #
In this section, we will install Meltano locally on your system, so that you can use it on the command line and from your browser.
Requirements #
Before you install Meltano, make sure you have the following requirements installed and up to date.
Unix-like environment #
Recent versions of Linux and macOS are both fully supported, but Windows is not.
If you’d like to run Meltano on Windows, you can install it inside the Windows Subsystem for Linux (WSL). You may also try installing Meltano on Docker, although Docker on Windows is known to have some idiosyncrasies that might hinder Meltano’s ability to function.
Python 3.7, 3.8 or 3.9 #
You may refer to https://realpython.com/installing-python/ for platform specific installation instructions.
Use the following command to check that you have the correct Python version installed:
python --version
Install pipx #
pip is a package installer that comes automatically with Python 3+.
pipx is a wrapper around pip which cleanly installs executable python tools (such as Meltano) into their own virtual environments.
# install pipx and ensure it is on the path
python3 -m pip install --user pipx
python3 -m pipx ensurepath
#Note that the below commands are not needed in most cases
source ~/.bashrc
For Windows, instead of source ~/.bashrc, you'll want to open up a new PowerShell instance.
Why use pipx and virtual environments?
Your local environment may use a different version of Python or other dependencies that are difficult to manage. The pipx installer automatically creates a virtual environment and provides a "clean" isolated space without version conflicts or other compatibility issues.
Install Meltano #
Now that you have pipx installed, run the following command to install the Meltano package into its own pipx-backed virtual environment:
pipx install meltano
Once the installation completes, you can check if it was successful by running:
meltano --version
Next Steps #
Now that you’ve installed Meltano and its requirements, you can continue setting up your Meltano project by following the Getting Started guide.
Installing on Docker #
Docker is an alternative installation option to using a virtual environment to run Meltano. To use these instructions you will need to install Docker onto your computer and have it running when you execute the commands below.
Using Pre-built Docker Images #
We maintain the meltano/meltano Docker image on DockerHub, which comes with Python and Meltano pre-installed.
To get the latest version of Meltano, pull the latest tag. Images for specific versions of Meltano are tagged v<X.Y.Z>, e.g. v1.55.0.
By default, these images come with a version of Python chosen for a balance of stability and compatibility, currently Python 3.8.
If you’d like to use a different version of Python instead, add a -python<X.Y> suffix to the image tag, e.g. latest-python3.7 and v1.54.0-python3.7.
# download or update to the latest version
docker pull meltano/meltano

# Or choose a specific version of Meltano and/or Python:
# docker pull meltano/meltano:v1.55.0
# docker pull meltano/meltano:latest-python3.7
# docker pull meltano/meltano:v1.55.0-python3.8

# check the currently installed version
docker run meltano/meltano --version
Initialize Your Project #
Once you have Docker installed, running, and have pulled the pre-built image you can use Meltano just as you would in our Getting Started Guide. However, the command line syntax is slightly different. For example, let’s create a new Meltano project:
cd /your/projects/directory

docker run -v "$(pwd)":/projects \
             -w /projects \
             meltano/meltano init yourprojectname
Then you can cd into your new project:
cd yourprojectname
We can then start the Meltano UI. Since ui is the default command, we can omit it.
docker run -v "$(pwd)":/project \
             -w /project \
             -p 5000:5000 \
             meltano/meltano
You can now visit http://localhost:5000 to access the Meltano UI.
Now that you’re successfully running Meltano, you can continue setting up your Meltano project by following the Getting Started guide.
Note that wherever you are asked to run the meltano command, you will want to run it through docker run as in the snippet above.
Troubleshooting Installation #
Are you having installation or deployment problems? We are here to help you. Check out Getting Help on the different ways to get in touch with us.
Upgrading Meltano Version #
We release new versions of Meltano every week. To keep tabs on the latest releases, follow along on the Meltano blog, or have a look at our CHANGELOG.
Using the command line #
You can update Meltano to the latest version by running the following command in your terminal from inside a Meltano project:
meltano upgrade
Using Meltano UI #
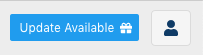
When an update is available, you will be informed of this automatically through a shiny blue button in the top right corner of Meltano UI:
Clicking this button will show more information and give you the option to install the update right away:
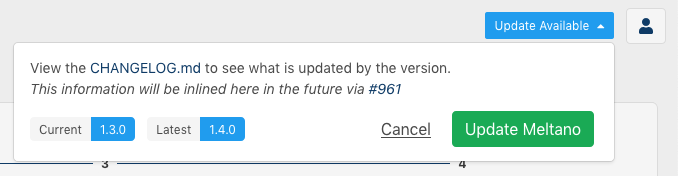
The Meltano UI will refresh automatically once installation is complete.